Honey Glazed Salmon

Looking for a quick and flavorful dinner? This Honey Glazed Salmon is here to save the day—especially when made with Falcon Ridge Farm’s fresh, locally harvested honey. Paired with tender, flaky salmon perfectly balances sweet, savory, and satisfying. Pair it with your farm-fresh greens for a healthy, family-friendly meal. Let’s cook!

You’ll need:

For the Salmon:

  • 4 (6 oz) salmon filets
  • ½ tsp kosher salt
  • ½ tsp black pepper
  • ½ tsp smoked paprika (or regular paprika)
  • ¼ tsp blackening seasoning (optional for extra depth)

For the Sauce:

  • 3 Tbsp butter
  • 2 tsp olive oil
  • 6 cloves garlic, minced
  • ½ cup honey
  • 3 Tbsp water
  • 3 Tbsp soy sauce
  • 1 Tbsp sriracha sauce (adjust to taste)
  • 2 Tbsp lemon juice

To make: 

Pat the salmon dry and season both sides with salt, pepper, paprika, and optional blackening seasoning. Set aside.

Preheat your oven’s broiler and move the rack to the middle to avoid burning. Melt butter and olive oil in a large oven-safe skillet over medium-high heat. Stir in garlic, honey, water, soy sauce, sriracha, and lemon juice. Let it simmer for about 30 seconds.

Add the salmon skin-side down and cook for 3 minutes, spooning sauce over the top as it cooks.

Transfer the skillet to the oven and broil for 5–6 minutes. Baste once more halfway through. The salmon should be caramelized, cooked through, and flaky.

Serve with farm-fresh produce and enjoy!

Sign up for our CSA farm boxes online today or visit us at a farmer’s market near you! You can find more delicious recipes on our blog.


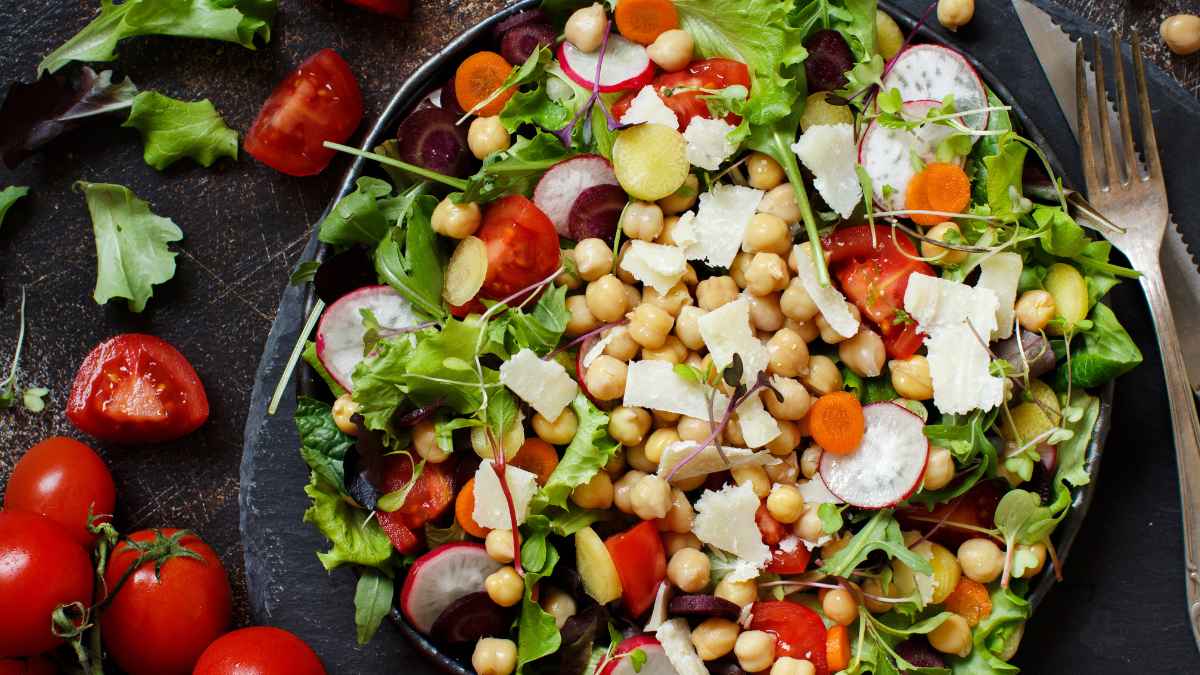
Microgreens and Chickpea Salad

This quick, colorful chickpea salad is flavorful and loaded with farm-fresh microgreens and crisp produce from our field! It’s the perfect way to use those radishes and greens to delicious use—tossed together with a zesty vinaigrette and topped with shaved parmesan cheese. It’s light, crunchy, and ready in minutes!

You’ll need:

  • 2 tablespoons extra-virgin olive oil
  • 2 tablespoons red wine vinegar
  • ¼ teaspoon garlic powder
  • ¼ teaspoon salt
  • ¼ teaspoon ground black pepper
  • 1 (15 oz) can no-salt-added chickpeas, drained and rinsed
  • 1 cup diced radish
  • 1 cup quartered tomatoes
  • 4 oz spinach microgreens, washed and patted dry
  • ¼ cup crumbled cheddar cheese

To make:

Drain and rinse your chickpeas. Wash the microgreens and gently pat them dry with a paper towel. Slice the radishes thinly and cut the tomatoes into bite-sized pieces.

Whisk together the olive oil, red wine vinegar, garlic powder, salt, and pepper in a large bowl for the dressing.

Add the chickpeas, radish, tomatoes, and spinach microgreens to the bowl. Toss well to coat everything evenly in the vinaigrette.

Sprinkle shaved parmesan and serve immediately.

Sign up for our CSA farm boxes online today or visit us at a farmer’s market near you! You can find more delicious recipes on our blog.

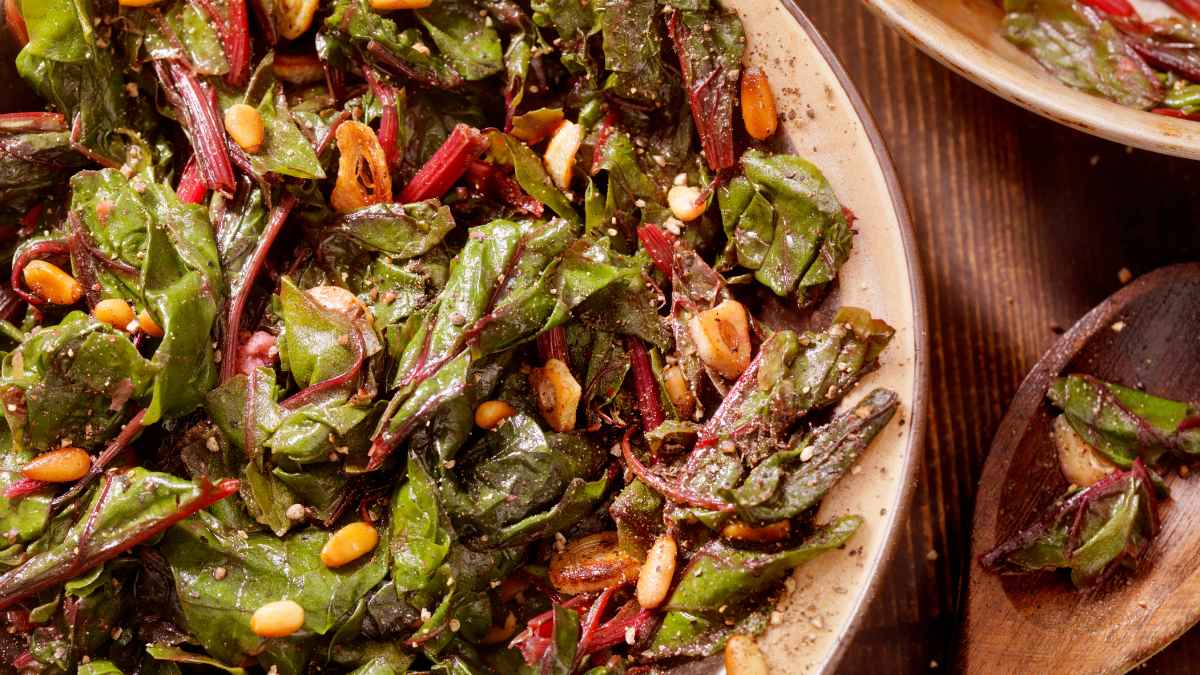
Sautéed Swiss Chard

If you’re looking for a fast and flavorful way to serve leafy greens, this Sautéed Swiss Chard with Garlic and Lemon is a go-to recipe that deserves a spot in your weekly rotation. It’s bright, garlicky, and ready in under 10 minutes—a fresh and healthy side dish that pairs perfectly with everything from roasted chicken to grilled salmon.

You’ll need:

    • 2 bunches Swiss chard (about 1 pound)
    • 1 tablespoon extra-virgin olive oil
    • 2 garlic cloves, thinly sliced
    • ¼ teaspoon sea salt, plus more to taste
    • Freshly ground black pepper
    • Lemon wedge, for squeezing

To make:

Slice the stems off the leaves. Chop the stems into thin slices (about ¼ inch) and coarsely chop the leaves.

Warm the olive oil in a large skillet over medium heat. Add the chard stems and cook for 1–2 minutes, just until they start to soften.

Toss in the chopped leaves, sliced garlic, salt, and a few grinds of pepper. Sauté for another 1–2 minutes, until the leaves are just wilted and tender.

Remove from heat, squeeze fresh lemon juice over the top, and toss to combine. Taste and adjust seasoning as needed.

Sign up for our CSA farm boxes online today or visit us at a farmer’s market near you! You can find more delicious recipes on our blog.
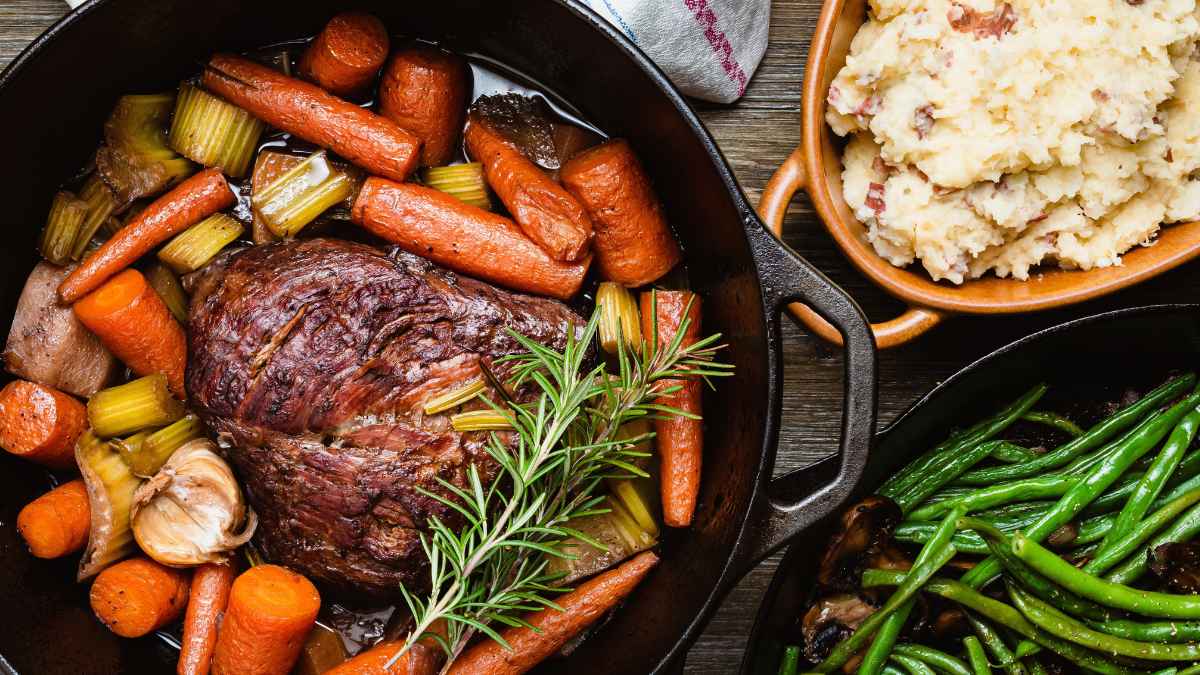
Sunday Pot Roast

There’s nothing quite like a slow-cooked pot roast to bring warmth and comfort to the table. This oven-braised version is rich, hearty, and flavorful—perfect for a lazy Sunday or a special family dinner. With tender chunks of beef, perfectly cooked vegetables, and a savory homemade gravy, it’s a one-pot wonder that’ll have everyone returning for seconds.

You’ll need:

  • 3–4 lb. boneless beef chuck roast
  • 2–3 Tbsp. Montreal Steak Seasoning
  • 2 Tbsp. olive oil
  • 1 large yellow onion, halved and cut into 1-inch pieces
  • 1 tsp. Kosher salt
  • ½ tsp. freshly ground black pepper
  • 3 cloves garlic, minced
  • 1 Tbsp. fresh thyme leaves
  • 1 bay leaf
  • ½ cup red cooking wine
  • 2 cups reduced-sodium beef broth
  • 3 celery ribs, cut into 2-inch pieces
  • 6 medium carrots, cut into 2-inch pieces
  • 6–8 small Yukon Gold potatoes, whole or halved if large
  • 3 Tbsp. all-purpose flour

To make:

Preheat your oven to 300°F. Pat the roast dry with paper towels, then season generously on all sides with Montreal Steak Seasoning.

In a large Dutch oven, heat olive oil over medium-high heat. Sear the roast on all sides until browned—this adds flavor. Once seared, remove the meat and set it aside on a plate.

Add the chopped onion to the pot along with salt and pepper. Cook until tender, about 7–8 minutes, then stir in garlic, thyme, and the bay leaf. Cook for 1 minute more.

Pour in the red wine and scrape up all the delicious brown bits stuck to the bottom of the pan. Return the roast and any juices to the pot. Add the beef broth, then nestle in your farm-fresh celery, carrots, and potatoes around the meat.

Cover the Dutch oven and bake for 2 to 2½ hours, or until the roast is fork-tender.

Remove the roast and vegetables to a platter and keep warm. Discard the bay leaf and skim off any excess fat from the pot. Bring the remaining liquid to a boil, then reduce the heat and let it simmer for about 5 minutes.

Whisk a few spoonfuls of the hot liquid in a small bowl with the flour until smooth. Slowly whisk that back into the pot, stirring constantly, until the gravy thickens to your liking.

Slice the roast, plate it with tender veggies, and ladle over the rich, homemade gravy. Serve with warm bread to soak up every last drop—or just a fork, because honestly, it’s that good.

Sign up for our farm boxes online today! You can find more delicious recipes on our blog.
Mashed Sweet Potatoes

These mashed sweet potatoes are buttery, smooth, and the perfect blend of savory and sweet. Whether you’re serving them up for a holiday feast or a cozy weeknight dinner, they’re a comforting side dish that’s always a hit!

You’ll need:

  • 4 pounds sweet potatoes, peeled

  • ⅓ cup butter, cut into 4 pieces

  • ⅓ cup half and half or milk, warmed

  • Salt and black pepper, to taste

  • Optional: A sprinkle of cinnamon for serving

To make:

Dice peeled sweet potatoes into 2-inch chunks for even cooking.

Bring a large pot of salted water to a boil. Add the sweet potatoes and cook for about 15 minutes until they’re fork-tender.

Drain the potatoes well and let them sit in the strainer for a few minutes to steam dry—this helps keep the mash from getting watery.

Transfer the potatoes back to the pot or a large mixing bowl. Add the butter and mash until mostly smooth. Slowly pour in the warmed cream or milk, a little at a time, until you reach your desired consistency. You might not need all of it.

Season with salt and black pepper to taste. Serve hot, and if you’re feeling festive, top with a light sprinkle of cinnamon for a touch of warmth.

Sign up for our farm boxes online today! You can find more delicious recipes on our blog.
Snowman Ornament

Are you looking for a creative and festive way to add a touch of handmade charm to your Christmas tree this year? These DIY snowman ornaments are the perfect solution! Made with just a few simple materials, they’re a delightful addition to your holiday décor and a fun project for kids and adults alike. Follow the steps below to create your very own snowman ornaments!

You’ll need:

To make:

  • Gather three large white beads. These will form the snowman’s body and head.
  • Using a black paint pen, draw two small dots for the eyes and a series of dots for the mouth.
  • Create a small carrot-shaped nose in the center of the bead with an orange paint pen. Let the paint dry before handling.
  • Take another bead and use the black paint pen to draw a vertical row of buttons. This bead will be the snowman’s torso.
  • To assemble your snowman, fold your 12-inch piece of twine in half. Thread the beads onto the twine in this order: First, a plain white bead (the snowman’s base). Second, the bead with the buttons. Finally, the decorated snowman head.
  • To secure the beads, tie a knot below the bottom bead to keep the beads in place. Tie another knot above the snowman’s head to create a loop for hanging.
  • If you’d like, use paint pens to add extra details, such as rosy cheeks, a scarf, or even a little hat!

Your snowman ornament is now ready to grace your Christmas tree. Hang it on a branch and enjoy the festive cheer it brings. These adorable ornaments also make great gifts or gift toppers for friends and family.

You can find more holiday recipes and crafts on our farm blog!

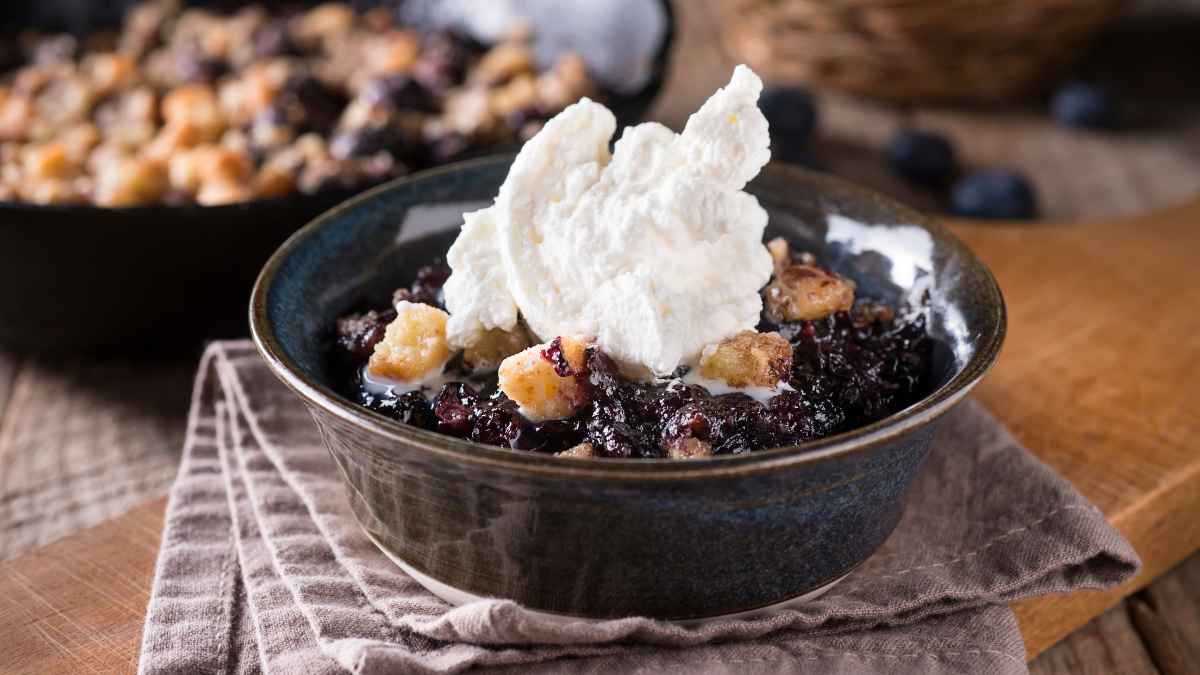
Blueberry Cream Cheese Cobbler

There’s nothing quite like the sweet, juicy taste of fresh blueberries, and this blueberry cobbler recipe perfectly captures their summery flavor. With a hint of lemon zest and creamy bits of cream cheese, this dessert is sure to be a hit at any gathering. Best of all, it’s easy to make and pairs wonderfully with a scoop of vanilla ice cream.

You’ll need:

  • 1/2 cup unsalted butter
  • 1/2 cup granulated sugar
  • 1 tsp vanilla extract
  • 3/4 cup milk
  • 1 cup all-purpose flour
  • 1 1/2 tsp baking powder
  • 1/2 tsp salt
  • 3 cups fresh blueberries
  • Zest of 1 lemon
  • 1 tbsp sugar
  • 4 oz cream cheese, cold and cut into bite-sized pieces
  • Powdered sugar for dusting
  • Vanilla ice cream for serving

To make:

  1. Preheat the Oven: Preheat your oven to 350°F (175°C).
  2. Brown the Butter: In a 10″ cast iron skillet over medium heat, melt the butter and continue to stir until it goes quiet and turns brown. This should take about 5-7 minutes. Pour the browned butter into a mixing bowl and let it cool for about 15 minutes. Do not clean the skillet, as it will be used to bake the cobbler.
  3. Prepare Dry Ingredients: While the butter cools, whisk together the flour, baking powder, and salt in a small bowl. Set aside.
  4. Prepare Blueberries: In another bowl, combine the blueberries, lemon zest, and 1 tablespoon of sugar. Set aside.
  5. Make the Batter: Once the butter has cooled (it can be a little warm but not hot), add the granulated sugar and vanilla extract to the bowl. Whisk to combine. Then whisk in half of the dry ingredients, followed by the milk, and then the remaining dry ingredients. The batter should be the consistency of thin pancake batter.
  6. Assemble the Cobbler: Pour the batter into the same skillet used to brown the butter. Scatter a handful of blueberries on top, then evenly disperse the cream cheese pieces throughout the cobbler. Top with the remaining blueberries.
  7. Bake: Bake in the preheated oven for 35-40 minutes, or until the top is golden brown and a toothpick inserted into the center comes out clean.
  8. Cool and Serve: Allow the cobbler to cool for at least 30 minutes. Dust with powdered sugar and serve with a scoop of vanilla ice cream. Enjoy!

Sign up for our farm boxes online today or find us at a farmers market near you! You can find more delicious recipes on our blog.

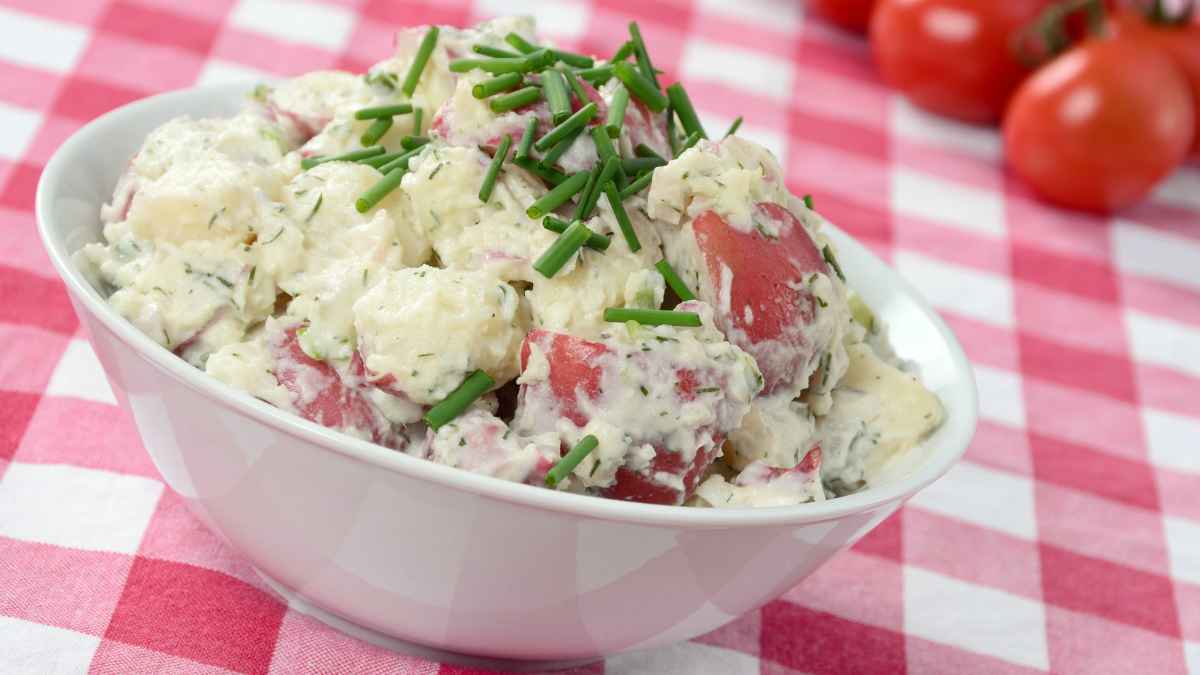
Red Potato Salad

Potato salad is a classic summer staple, and this creamy red potato salad recipe will surely be a hit at your next picnic or barbecue. This dish is delicious with a perfect blend of tender red potatoes, crunchy celery, tangy pickles, and fresh herbs, all tossed in a creamy dressing. Let’s dive into the recipe!

You’ll need:

  • 2 pounds small red potatoes
  • 2 tablespoons red wine vinegar, white wine vinegar, apple cider vinegar, or dill pickle juice
  • 1/2 cup sour cream
  • 1/4 cup mayonnaise
  • 1 tablespoon yellow mustard (Dijon or whole grain mustard can be substituted)
  • 2 celery stalks, finely chopped (about 1/3 cup)
  • 1 to 2 medium dill pickles, finely chopped (about 1/3 cup)
  • 1/4 cup chopped fresh parsley
  • 1/4 cup chopped fresh dill
  • 1/4 cup chopped fresh chives
  • Salt and fresh ground black pepper

To make:

  1. Cook the Potatoes: Add the potatoes to a large pot and cover with 1 ½ inches of water. Season with salt (use one teaspoon for every quart of water). Bring the water to a boil, then reduce to a simmer. Cook for 15 to 20 minutes or until the potatoes are easily pierced with a fork.
  2. Prepare an Ice Bath: Meanwhile, set up an ice bath by adding cold water to a medium bowl filled with ice. Drain the potatoes and place them into the ice bath to cool.
  3. Chop the Potatoes: When the potatoes are cool enough to handle, chop them into bite-size chunks and add them to a large bowl. Scatter the vinegar over the potatoes and lightly season with salt.
  4. Make the Dressing: In a separate bowl, stir together the mayonnaise, sour cream, and mustard.
  5. Combine Ingredients: Add the mayonnaise mixture, celery, pickles, parsley, dill, and chives to the potatoes. Gently stir to combine, being careful not to mash the potatoes too much.
  6. Season: Season the salad with salt and pepper to taste. For best results, refrigerate the salad for at least 30 minutes before serving to allow the flavors to meld together.

Sign up for our farm boxes online today or find us at a farmers market near you! You can find more delicious recipes on our blog.

Strawberry Shortcake Biscuits

There’s something magical about strawberry shortcake. The combination of fluffy biscuits, sweet and juicy strawberries, and rich whipped cream is irresistible. This recipe for strawberry shortcake biscuits is the perfect way to enjoy fresh summer strawberries.

You’ll need:

Biscuits

  • 2 cups all-purpose flour
  • 1 tablespoon baking powder
  • 1/2 teaspoon baking soda
  • 1 teaspoon kosher salt
  • 3/4 cup unsalted butter, straight from the fridge
  • 1/2 cup buttermilk, cold and shaken
  • 1 large egg
  • 1 tablespoon egg + 1 tablespoon water for egg wash

Strawberries

  • 1 pound strawberries, stems removed (hulled), quartered, and sliced
  • 3 tablespoons white granulated sugar
  • 1 teaspoon vanilla extract
  • Pinch kosher salt
  • 2 tablespoons powdered sugar
  • 3/4 cup heavy cream

To make:

  1. Preheat Oven: Preheat your oven to 400°F (200°C). Line a baking sheet with parchment paper and set aside.
  2. Mix Dry Ingredients: In a large bowl, mix together the all-purpose flour, baking powder, baking soda, and kosher salt.
  3. Grate Butter: Grate the cold butter into the flour mixture using a box grater. Transfer the bowl to the freezer for 5-7 minutes while you prepare the wet ingredients.
  4. Prepare Wet Ingredients: Measure out the buttermilk and add the egg; whisk until combined. In a small bowl, make the egg wash by whisking together the egg and water. Transfer both to the refrigerator.
  5. Combine Ingredients: Remove the bowl from the freezer. Using your hands, gently break up the butter and combine it with the flour until the mixture resembles small peas. Add the buttermilk mixture all at once to the flour mixture. Mix until barely combined, then lightly knead the dough until it forms one solid mass.
  6. Shape the Dough: Sprinkle your kitchen counter with flour and dump the dough onto it. Press the dough into a 3/4-inch thickness.
  7. Cut Biscuits: Use a 2 1/2-inch biscuit cutter to cut out the biscuits, yielding about 6 biscuits. You can recombine the scraps to get 2 more biscuits. Transfer them to the prepared baking sheet.
  8. Chill the Biscuits: If you’ve been moving slowly, place the baking sheet in the freezer for 5 minutes to get the bits of butter nice and cold again.
  9. Bake: After chilling, brush the tops of the biscuits with the egg wash. Bake in the preheated oven for 10 to 15 minutes, until tall and medium golden brown.
  10. Macerate the Strawberries: In a small bowl, mix together the strawberries, granulated sugar, vanilla extract, and a pinch of salt. Allow to stand and macerate for 10 minutes.
  11. Whip the Cream: Sift the powdered sugar into a medium bowl. Pour in the heavy cream and beat using a hand-held electric mixer or a stand mixer for about 1 to 2 minutes, until soft and pillowy.

Slice the biscuits in half. Add a spoonful of strawberries and top with a big dollop of whipped cream. Serve and enjoy!

Sign up for our farm boxes online today! You can find more delicious recipes on our blog.
Grilled Bell Peppers

Grilled bell peppers are proof that sometimes the simplest recipes can be the most delicious. This easy-to-make side dish is perfect for summer, bringing out the natural sweetness of the peppers and adding a delightful charred flavor. Let’s fire up the grill and get started!

You’ll need:

  • 4 large sweet bell peppers: Red, orange, and yellow are best for their sweetness, while green peppers are less sweet.
  • Olive oil
  • Sea salt & black pepper

To make:

  1. Heat your grill over medium-high heat for about 5-10 minutes until hot.
  2. Slice the bell peppers in half and remove the stems, seeds, and pith with a sharp knife.
  3. Using a basting or pastry brush, coat both sides of the pepper halves with olive oil.
  4. Place the bell peppers cut side down onto the preheated grill. Cook undisturbed with the lid closed for 4-5 minutes.
  5. Flip the peppers to the other side and grill with the lid closed for an additional 4-5 minutes until the peppers are cooked al dente with a nice char.
  6. Transfer the peppers from the grill to a foil-lined pan (optional) or plate. Season both sides with sea salt and fresh cracked black pepper. Drizzle with a little aged balsamic or chimichurri for extra flavor. Enjoy!

Sign up for our farm boxes online today! You can find more delicious recipes on our blog.